
Setting up a Dual-PC Streaming Rig
UPDATE: I have a newer post on this topic that is a more comprehensive discussion of how I converted this to a triple-PC/Mac setup and dealt with camera and audio sharing. I suggest reading both, as the newer ones build on this one.
A few weeks back, I posted a link to a video Jayne had posted about his dual-PC twitch streaming setup. I was intrigued, since streaming and recording 3D and VR content, without bogging down the machine creating the content, has been a goal of mine, but I'd never found any good advice that seemed trustworthy before.
I goofed around with this over the last few weekends, using a second PC I had laying about as the streaming PC. I learned a few things along the way, which others might find useful, so I thought I'd share.
(I suggest all my grown-up friends, who find my gaming hobby silly, move along to some more serious article.)
Making this work required a mix of hardware and a software.
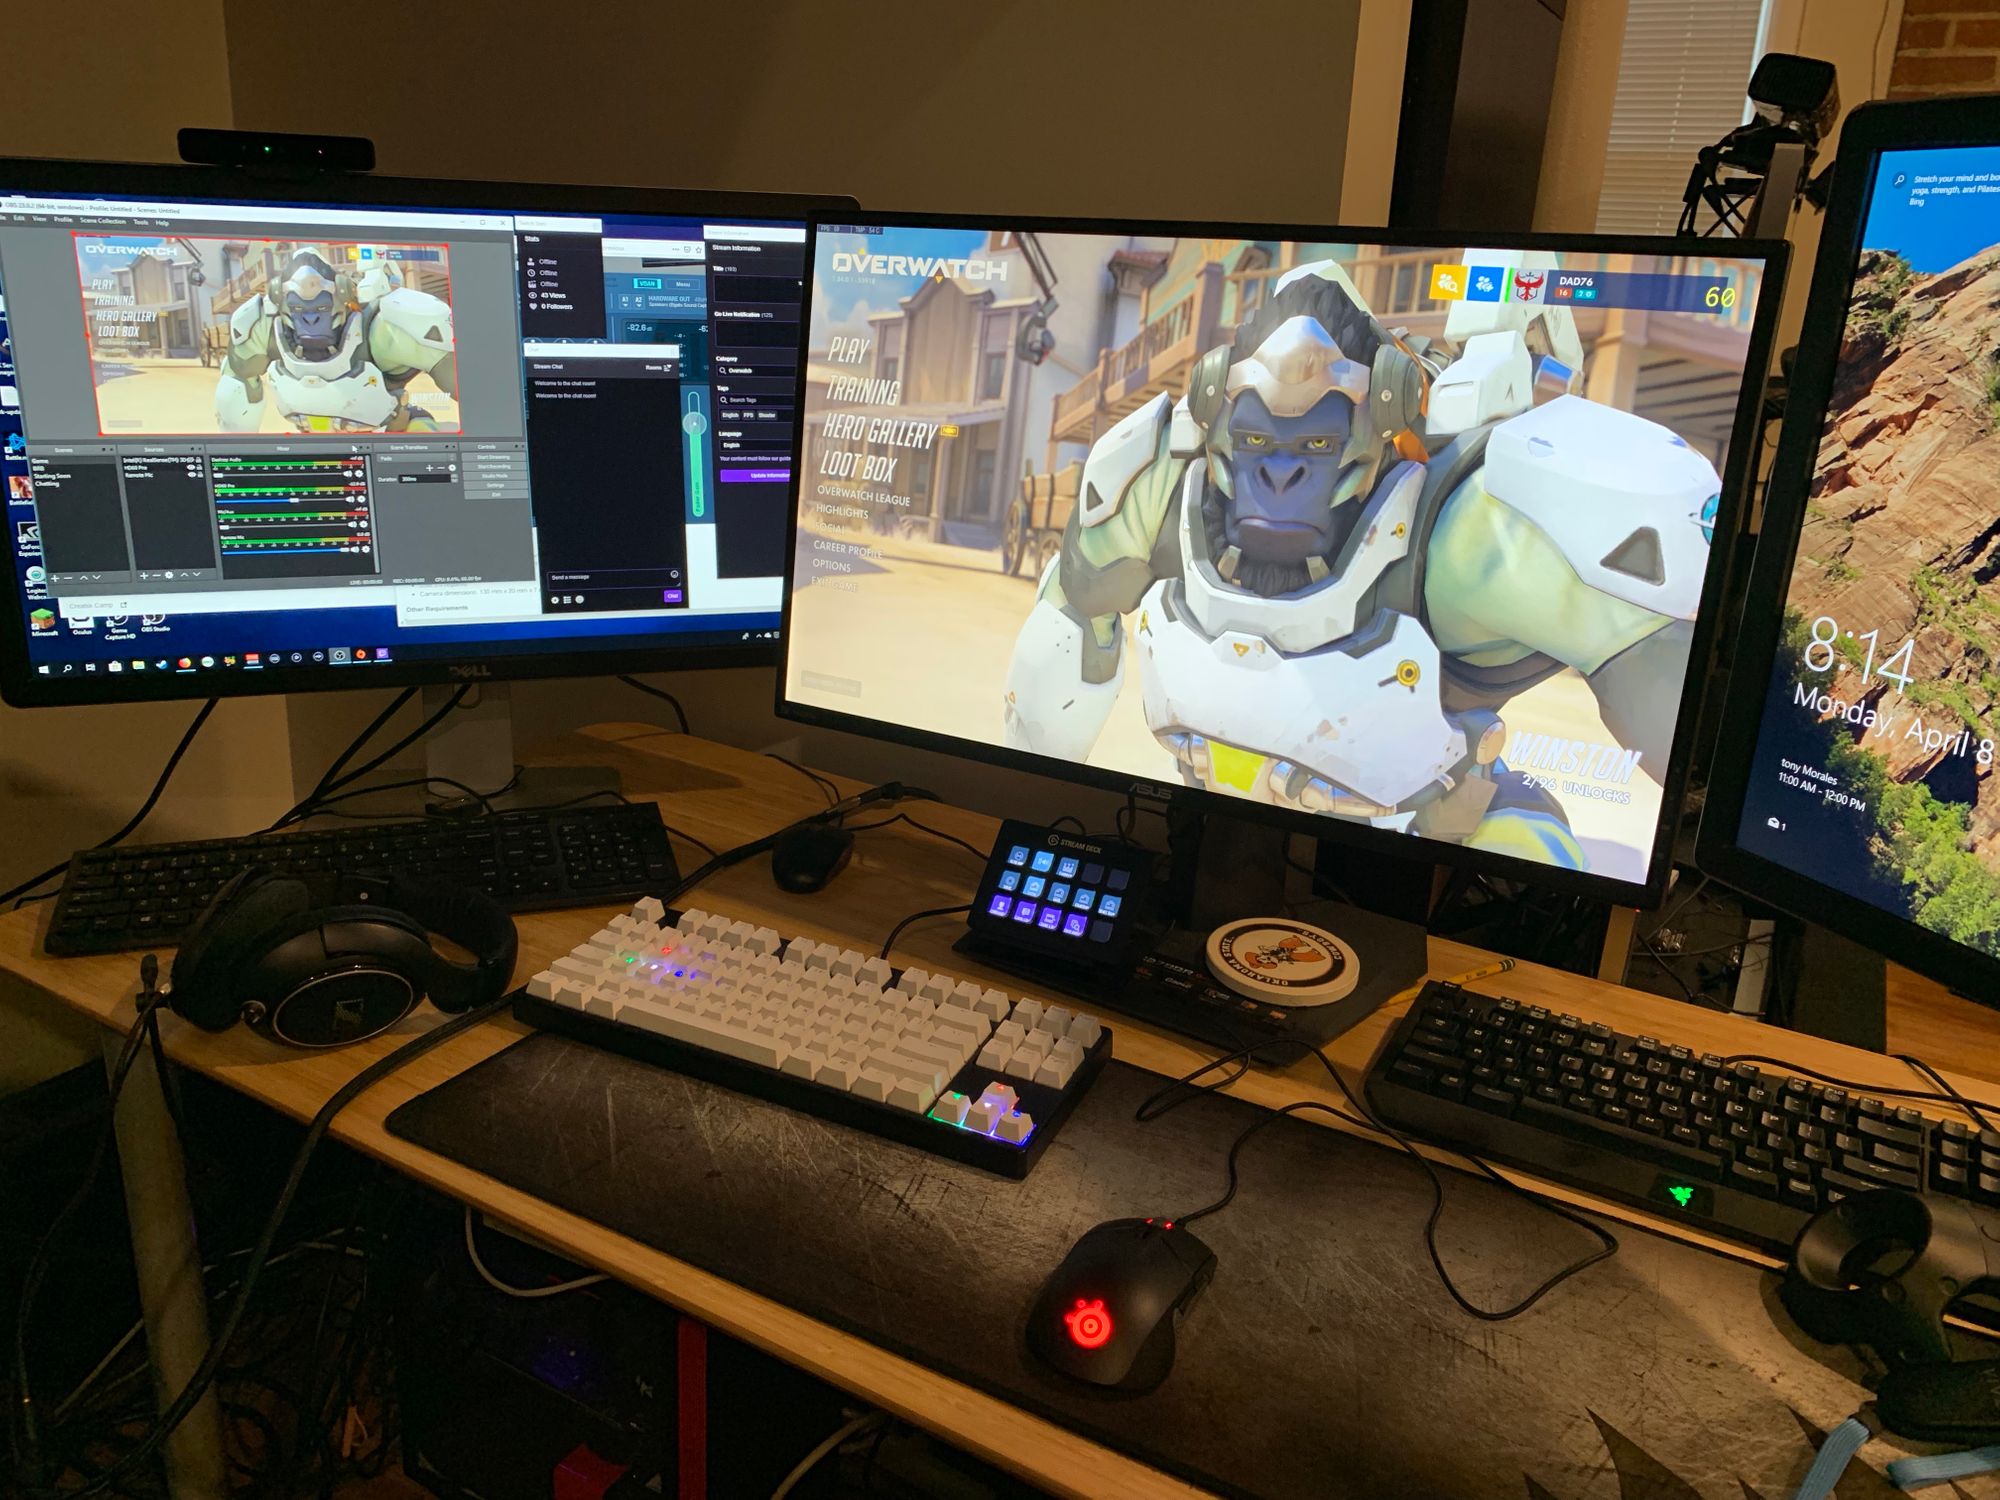
First and foremost, I put an Elgato HD60 Pro capture card in the second PC. In Jayne's video he recommends the Elgato 4K60 Pro because it'll capture 4k @ 60Hz (vs 1080p @ 60Hz for the HD60 Pro). Which sounds great, but it requires (at a minimum) a high end i7 processor and at least a GTX 1060 card. My spare PC has an i5 and dual GTX 960 cards, so my choice was to spend more ~$300 on the 4K60 and another ~$500 on a new processor and card, or spend ~$160 on the HD60 that works just fine in this old machine. Easy choice. Especially since my crappy internet connection is only 7Mbps up, so it's not like I can stream 4k video anyway. Plus, the HD60 Pro has Elgato's "Master Copy" feature, which will save a full-resolution copy of whatever is being streamed, independent of the stream.
A nice feature of the relatively recent Windows 10 builds in that I can send 1080p @ 60Hz over HDMI from the main PC to the streaming PC, even though it's mirroring my main gaming monitor at either 4k @ 165 Hz or 1080p @ 165Hz. The downsampling (resolution and rate) happens on the GPU, so it doesn't seem to have any noticable performance negative impact.
On the capture machine, I'm running OBS to stream to twitch. I've got it set for 851p @ 50Hz using ~4Mpbs. A bit fuzzy compared to 1080p, but pretty good mix of quality and resolution at that bit rate. I'm using an Intel Realsense capture camera on the off chance I ever want to put my face in a stream (which I admit is very unlikely, but hey, the camera was sitting there, so I figured I'd see what it looked like set up, using the depth camera to create a "virtual green screen" mix).
With the video going over HDMI to the capture PC, the final problem was audio. I needed to get the audio from the game to go over both HDMI and to my headphones (Windows doesn't generally support sending the audio to two outputs simultaneously). Similarly, I needed to get my mic to go into both machines (so it can go into game chat on the game machine, and be controlled as a separate audio track in OBS on the streaming machine). Which is where a neat little piece of software called VB-Audio VoiceMeeter come in.
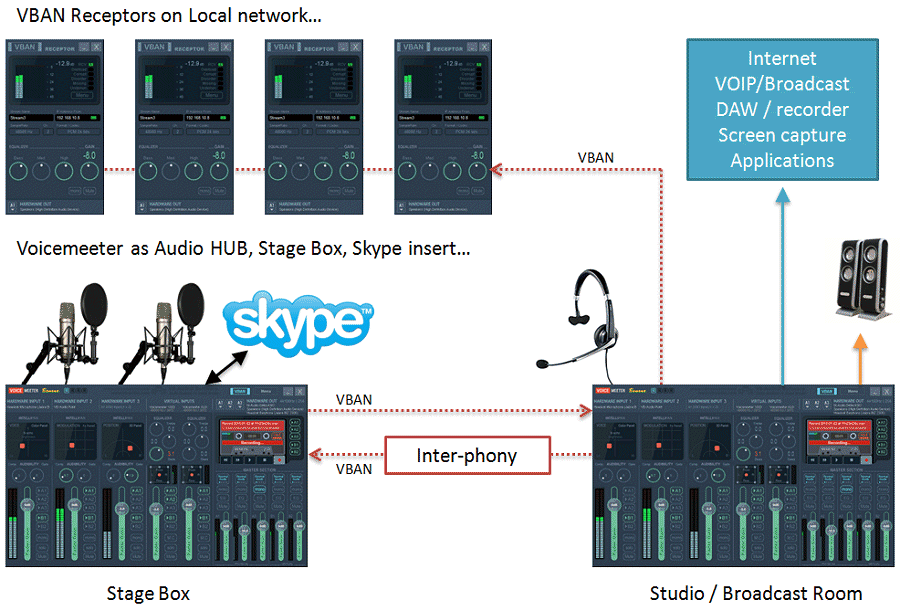
Using VoiceMeeter on the game machine, I take the computer audio in and send it to both my headphones and to the HDMI output to the streaming PC. Then, I take the mic input, leave it as the computer mic input, but also set it to stream out to the second PC over the network. On the second PC, I use VoiceMeeter to take the network stream in and direct it into OBS as a separate audio track. Easy-peasy.
At this point, I can turn on a twitch stream of my gaming machine without doing anything on the gaming PC, and especially without impacting the performance of whatever is happening on it. I can see the status of the twitch stream, and adjust anything I might want, without interrupting the game itself. (I can also switch HDMI cable and stream from my work VR machine if I want; I may get a small HDMI switch to simplify this.)
Alas, it's a little fiddly to turn streaming on/off, turn mic audio/on off, or switch OBS scenes, using the second keyboard and mouse (which are tucked under the streaming PC monitor). That's where the final, slightly gratuitous, bit of kit comes in, an Elgato Stream Deck (you can see it sitting under the main monitor in the picture at the top, the little box with a bunch of lit up squares on it).
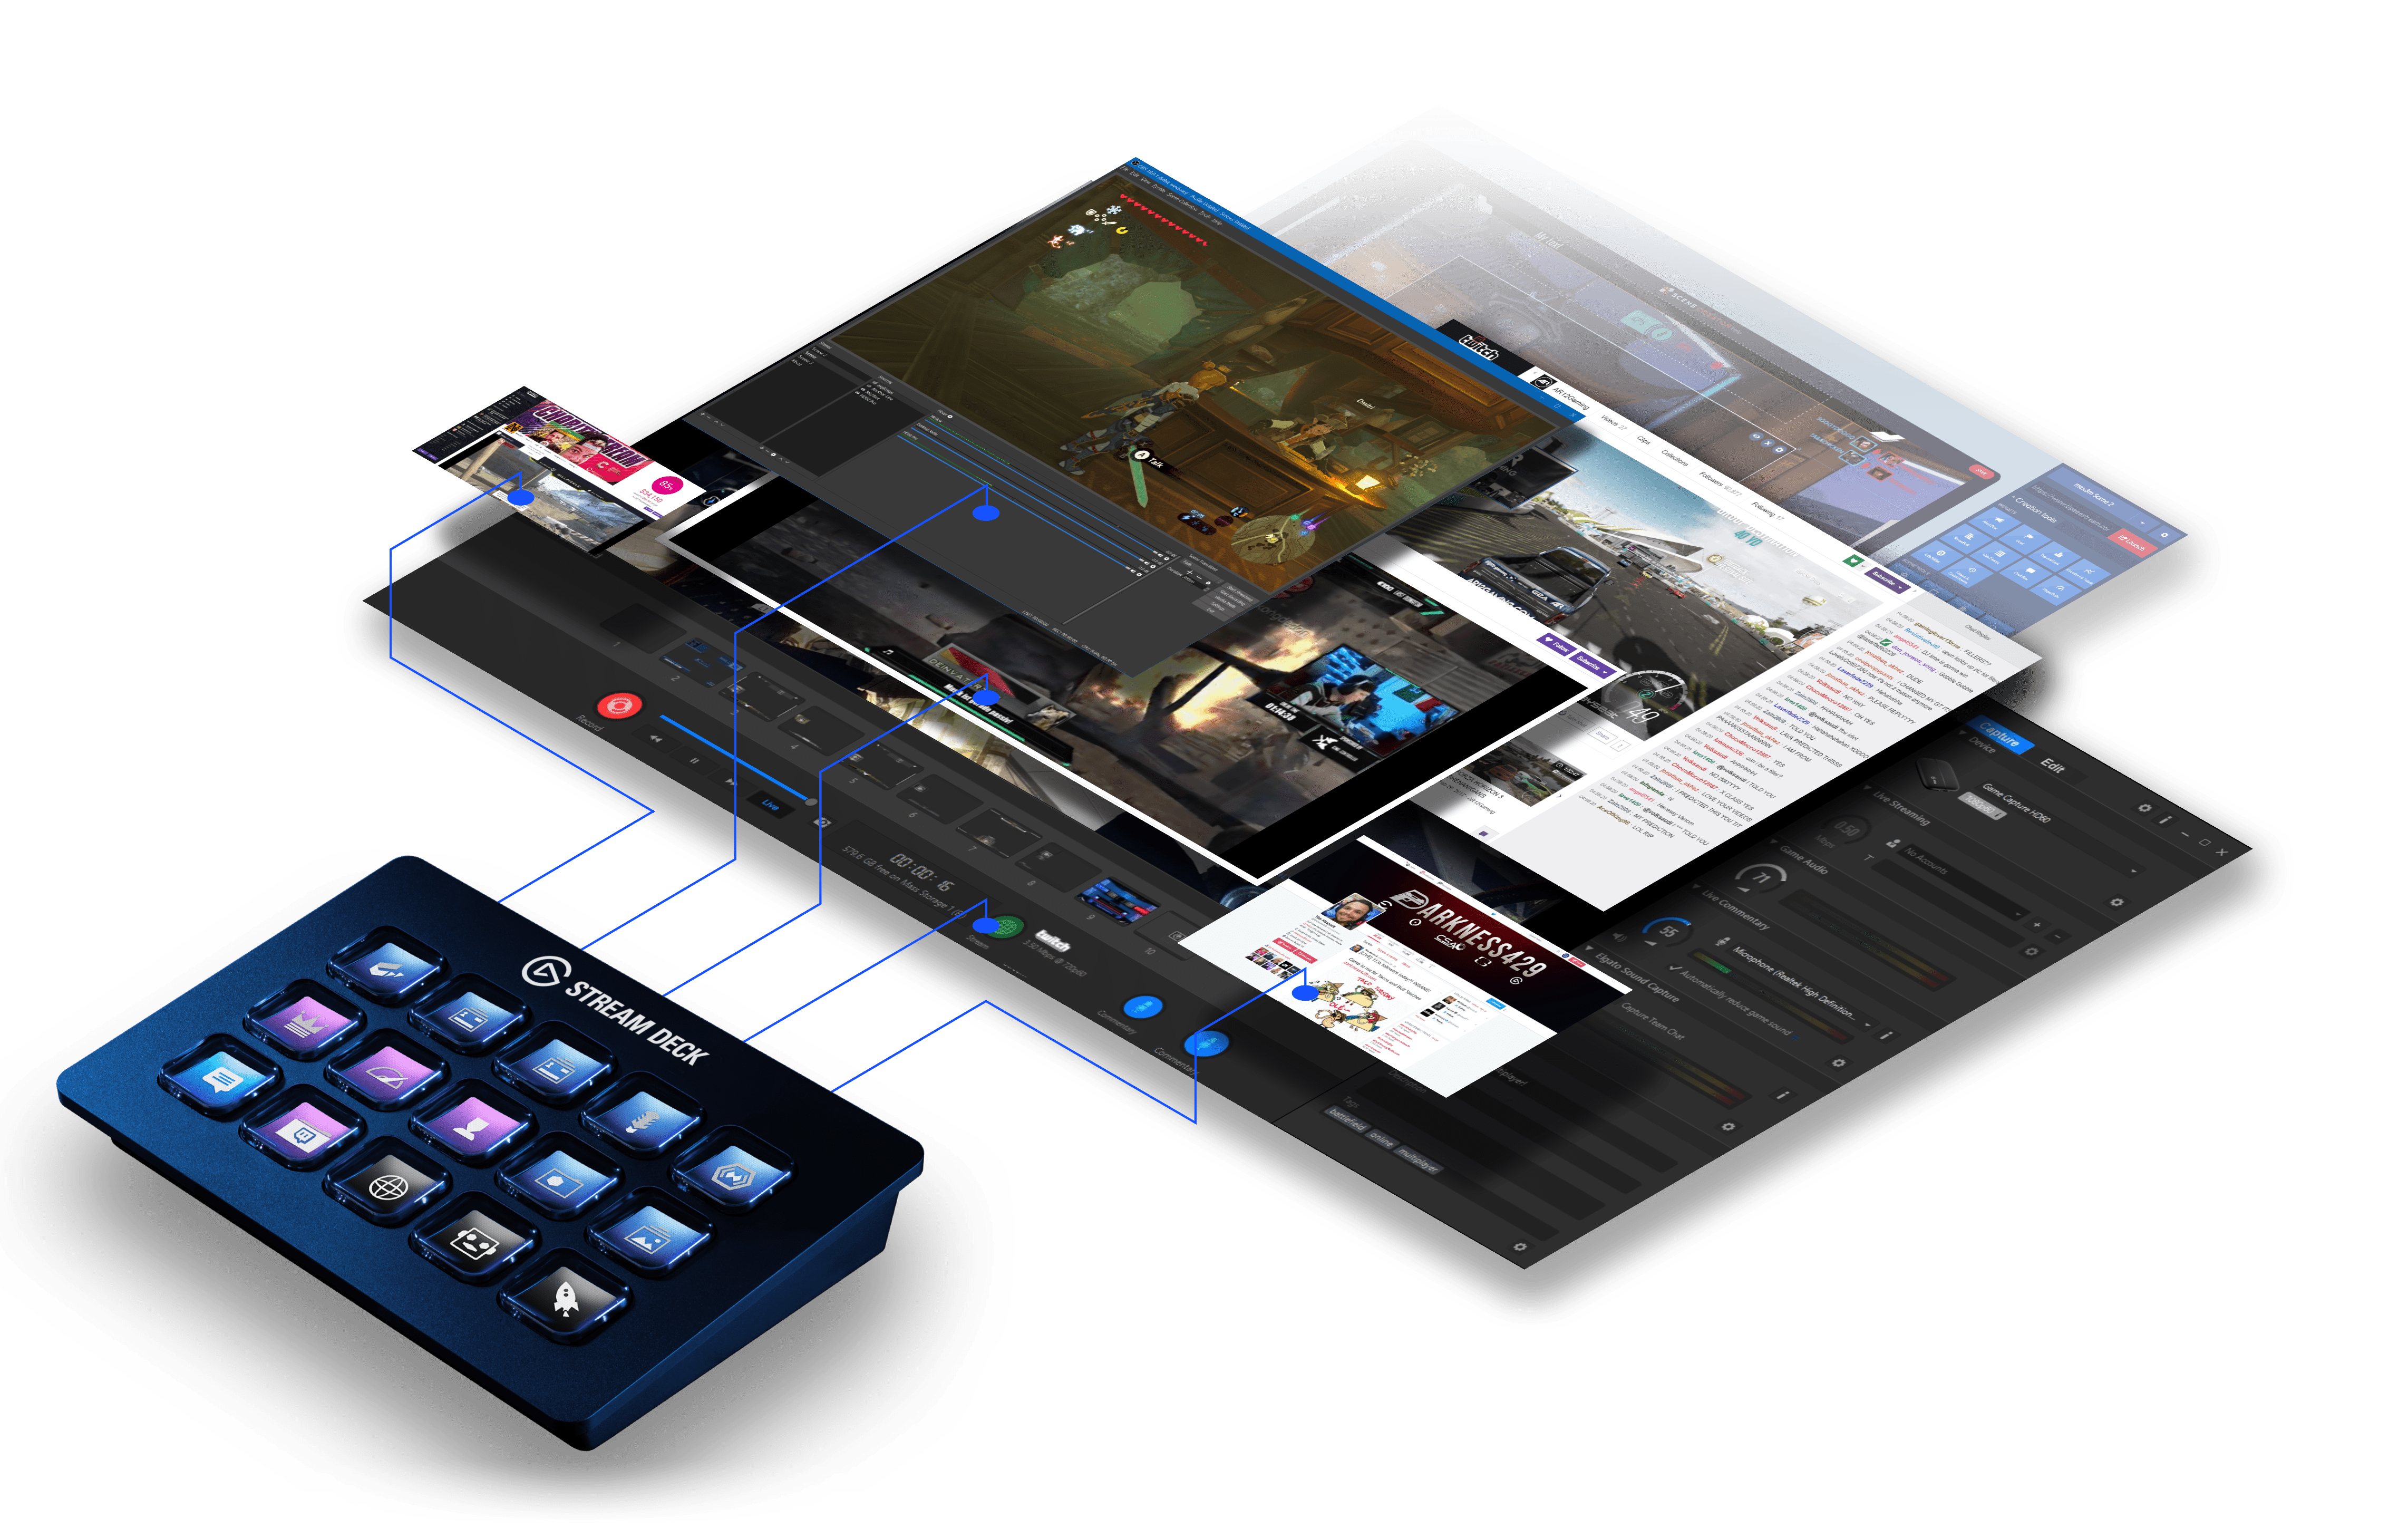
I have the Stream Deck plugged into the streaming machine, and set up actions on it to control OBS by turning streaming on/off, recording to disk on/off, mic streaming on/off, and the face camera on/off. Beyond that, I've set up buttons for switching between a few OBS scenes. I've also got some actions to control the twitch stream itself, like setting the steam title and description to one of a few presents. The Stream Deck buttons are small displays, so they can provide instant feedback beyond just displaying a button, such as showing the number of current viewers on the stream (always 0 for my new, relatively boring account, of course).
Anyway, it's not like I'm going to become a streamer, but it's really nice to be able to stream or to capture clips of whatever is going on, at full 1080p @ 60Hz, without impacting the computer running the experience. In the past, when I tried to capture something (like a VR game), it would have a visible impact on the performance, drop frames, and so on. Now, streaming and capture are silky smooth, and have no impact on the main experience.
All in all, it was a fun little project, and I hope this writeup has been useful to someone. Feel free to reach out with questions or comments if you have any.