Setting Up a Local Babylon Development Environment
(This is a more "web log" style post than I normally do, taking notes for my students on how to set up to do local web development for BabylonJS)
There are many ways you could develop for Babylon. For the class I'm teaching this semester, I'm having students do both WebXR and desktop 3D projects, so they will want to create substantial programs and be able to do local debugging. They will also need to run and debug on either a PC-connected or standalone VR display on a Windows 10 PC, a Mac, or Linux. Because this will be many students first time doing modern non-trivial web development, I'd like them to use the modern module (ESNext) version of Babylon.
First up, everyone will need to install Node locally. You can download and install from this link, but I highly recommend installing and using nvm instead, a version manager for Node. (for Windows there is a similar nvm, but I haven't used it.)
You can also install Typescript locally, but we can just install the appropriate version for each project as part of its dependencies. The sample below, and the example projects for the class, include typescript in their devDependencies.
Next, install a code editor designed for doing web development. I use Visual Studio Code (aka VSCode), and highly recommend using that if you aren't already invested in another code editor. It is well integrated with git and typescript.
Make sure you have an up-to-date version of git installed, and probably Github Desktop (a graphical git client). You will also want to set up a credential helper to tell Git to remember your credentials (I used those instructions for MacOS, but on Windows10, I used GCM, the Github Credential Manager).
For folks on Mac and Linux, things should be ready to go. Most webdev things in npm are designed to work on various Unix-based OSs. If you want to use use Node on Windows10, it is generally ok too, but I've run into issues.
If you are ready, skip to the instructions below to test your setup.
For Those Wanting a more Unix-like Experience on Windows
If you want have the most compatibility with various web development tooling, you can set up and use WSL2 (the Windows Subsystem for Linux version2). The instructions are detailed and a bit complicated, but should be managable if you're comfortable with Windows.
I did this for the first time recently, since I'm much more comfortable with Unix shells than the Windows CMD prompt.
In the end, you will have a fully running version of Linux (I chose Ubuntu), and can follow their instructions to set up Node. These instructions also show you how you can set up the Remote-WSL Extension inside your Windows10 VSCode so you can edit in VSCode on Windows, and still use the Linux tooling and filesystem. You'll want to set up git inside WSL2, including following their instructions to point the WSL2 git at the Windows10 GCM installed above.
To use the graphics Github Desktop, you can access the WSL2 filesystem from Windows10 as follows:
- access \\wsl$ in the File Explorer.
- either map the \\wsl$\Ubuntu directory to a drive (Z:), or navigate to your home directory (for me it was \\wsl$\Ubuntu\home\blair) and drag it to the Quick access area.
Either way, now you can use Github Desktop from Windows10, and navigate to your prefered folder to store your github projects.
Making sure it all works
To verify things are working, grab a Babylon sample project like https://github.com/RaananW/babylonjs-webpack-es6. If you haven't used github before, you can click on the green "Code" button and select "Open with Github Desktop".
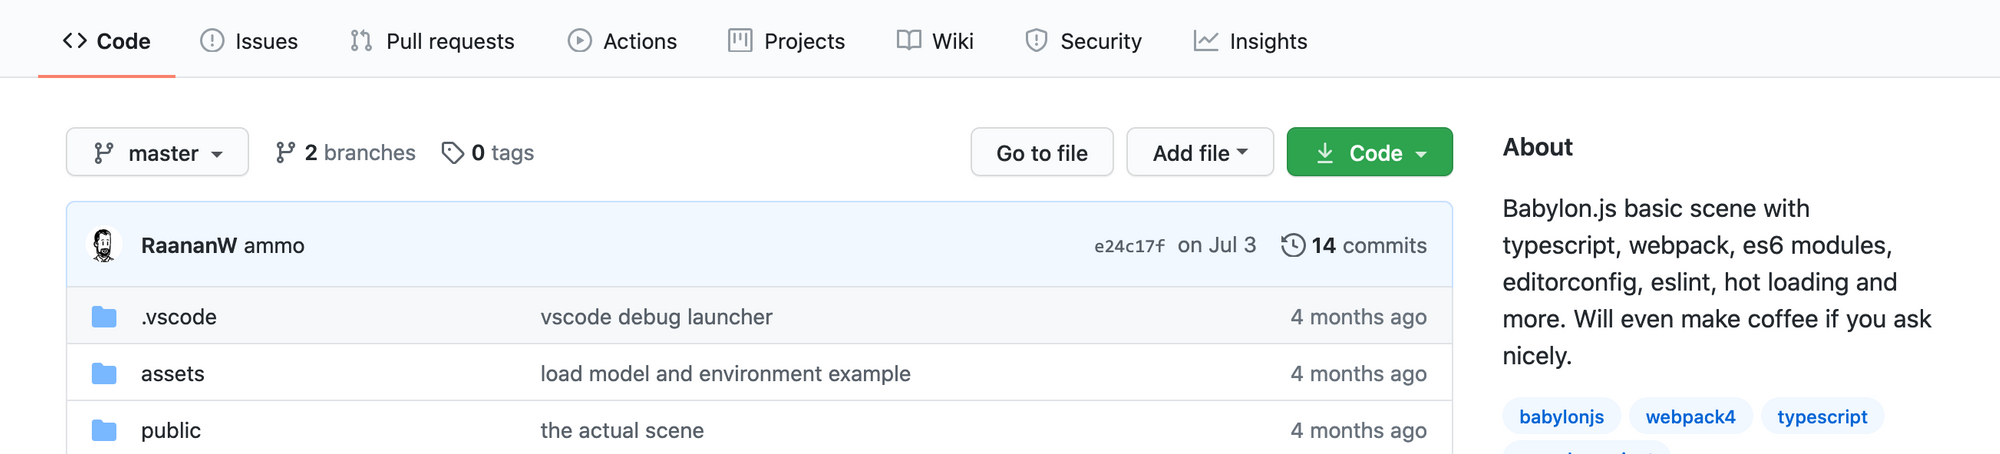
This will open Github Desktop, and allow you to pick a location to save the local copy of the project. I personally have a "github" directory, under which I have a few folders to organize projects (personal, presentation, graphics, gatech, ...).
When the repository is fully downloaded, go to the directory and run
- npm install
This will take a while, as it downloads and sets up all the dependencies for this project (including typescript and babylon!) in the node_modules directory. When this finishes, assuming there are no errors, run
- npm run start
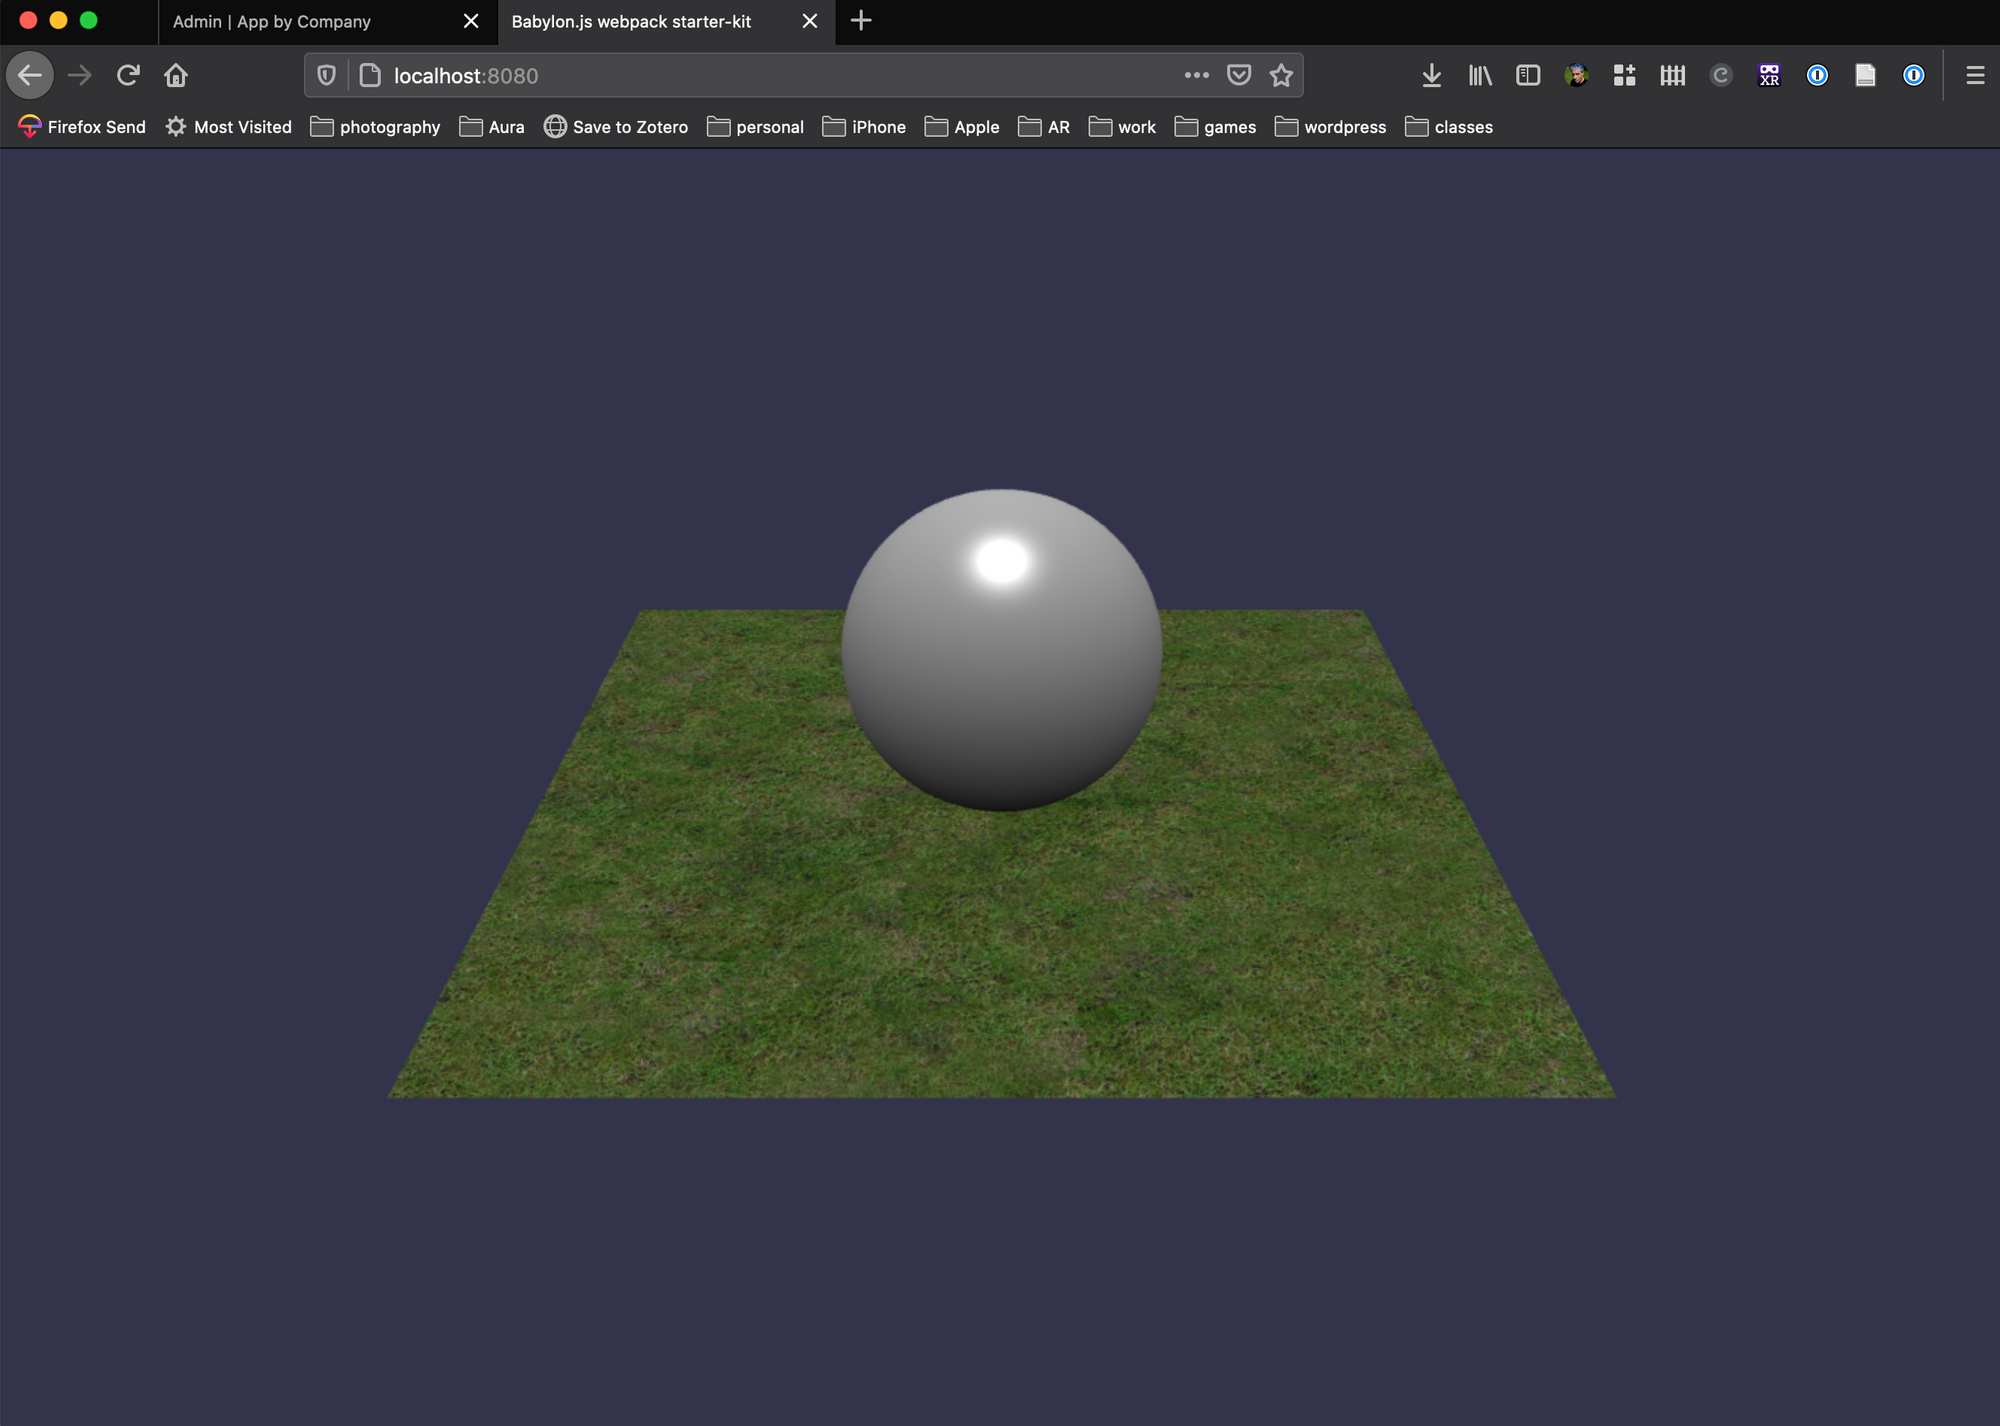
and it should compile the project, start a small web server, and open your web browser to point at it (http://localhost:8080).
Assuming you see something like this, you're ready to go!